FTC Basic Teleop
FTC programming contains lots of concepts that are very specific to robotics and not regular programming. In this tutorial I plan to cover some of those concepts and basics. This tutorial will show how to create basic OpModes for Teleop. I’ll assume you have some basic knowledge of the FTC hardware.
Table of Contents
- Table of Contents
- Getting Set Up
- Creating your first OpMode
- Actually Doing Stuff with Teleop
- Joysticks
Getting Set Up
You should have Android Studio and the FTC SDK downloaded. Here is a good tutorial on how to do that. Open up the SDK inside Android Studio, You may see a notification like this:
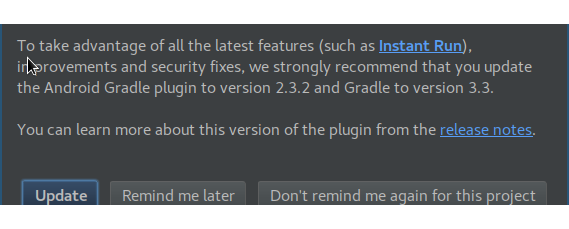
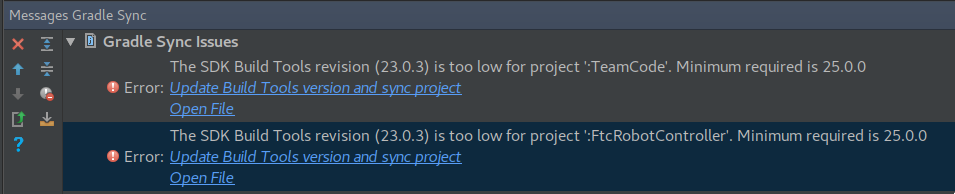
Click Update to make sure you’re on the latest version. Another error may pop up like below. You should click the links for Update Build Tools.
A status bar like below shows the status of your program compiling or uploading to the phone.

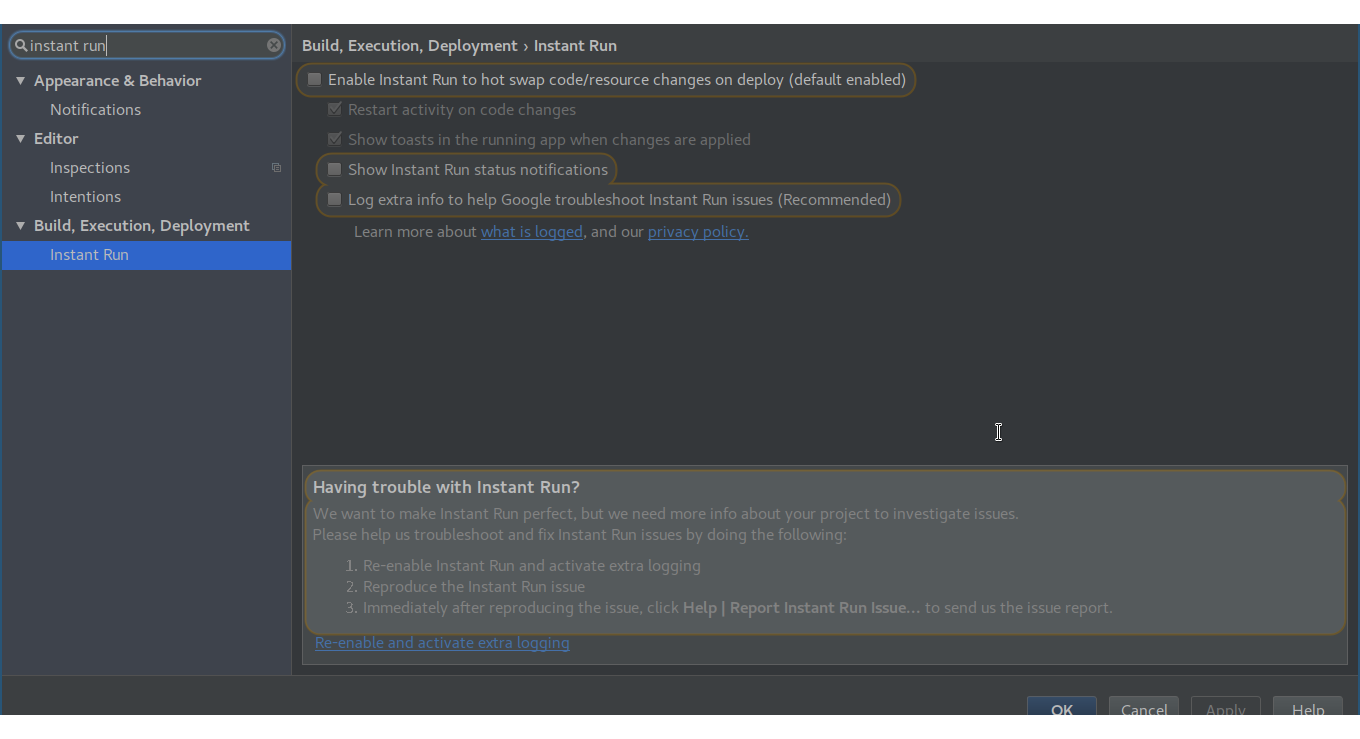
Next you should disable Instant Run in Android Studio because sometimes it stops new OpModes from showing up on the phones, and occasionally stop OpModes from updating with new code. Go to File->Settings in the toolbar and search for instant run and make sure it’s unchecked.
Creating your first OpMode
The SDK FIRST developed is a library of code that you can use to control your robot. Basically it’s just a folder with many files that have code inside of them.
On the left in Android Studio there is a list of the files inside of the SDK. It’s similar to a file manager, but specifically for Android code. The OpModes you’ll write go inside of TeamCode -> java -> org.firstinspires.ftc.teamcode. To create a new OpMode right click on the org.firstinspires.ftc.teamcode folder and select new -> Java Class. A window should pop up, but all you’ll need to enter is the name of your OpMode. I chose MyFirstOpMode. A file with something similar to the following code should show up:
package org.firstinspires.ftc.teamcode;

/**
 * Created by nicholas on 9/5/17.
 */

public class MyFirstOpMode {
}
Within the SDK, FIRST made a class called OpMode. Classes are blueprints, and objects are new things created from those blueprint templates. Inside of the OpMode class are functions and variables that you can use to run your code on the robot. To use these functions and variables FIRST made, we extend from FIRST’s OpMode class. This means that our MyFirstOpMode class has all of the stuff FIRST’s OpMode has, and our new stuff. An important thing to know is that the stuff in our class won’t modify the stuff in FIRST’s blueprint. extend copies the stuff from FIRST’s class blueprint into our blueprint. We use extend like this:
public class MyFirstOpMode extends OpMode {
}
A red line like a grammar error should show up under the public class… line. This means that Android Studio has found an error in our program. Android Studio doesn’t catch all errors, but only ones that stop the program from running in the first place. It doesn’t catch errors in programmer logic :(
If you hover over red lines, you should see the error. In this case, the error is Class 'MyFirstOpMode' must either be declared abstract or abstract method 'loop()' in 'OpMode'. Don’t worry! Errors are hard to read, but you’ll learn how. Basically it’s saying that your class needs to implement the loop() method for this to work. Let’s implement that:
public class MyFirstOpMode extends OpMode {
    public void loop() {

    }
}
Now there should be a new error, but this time it mentions implement and init(). We know what that means!
public class MyFirstOpMode extends OpMode {
    public void init() {

    }

    public void loop() {

    }
}
Now no red underlines should show up. Great job reader! :)
Actually Doing Stuff with Teleop
How do we actually do things Nick? I want to control my robot… So, let’s work on Teleop first. To tell the SDK that this OpMode is a Teleop OpMode and not an Autonomous OpMode, we put @TeleOp above the class like so:
@TeleOp
public class MyFirstOpMode extends OpMode {
    public void init() {

    }

    public void loop() {

    }
}
The way OpMode works is that first the code inside init() is run. Then, the code inside of loop() is run over and over endlessly until you press stop on the Driver Station or the autonomous period ends.
Let’s write our Teleop for a tank drive robot with one motor on each side. In the code, we’ll name them left and right. We create two variables with the type DcMotor inside the MyFirstOpMode class, but inside of any functions. You put them inside of the class rather than the functions because when a variable is created inside of the function it is removed when the code inside of the function stops running, and it can’t be accessed by other code outside of the function. Variables inside of the class can be accessed inside of any function and will be removed when the OpMode finishes. As you already know, we want to create the variables left and right inside of the class so that any code inside of the OpMode can access the motors.
The type of a variable is what the variable is. For instance there is an int type for integers, a double type for decimal numbers, a Money type for monetary values, etc.
@TeleOp
public class MyFirstOpMode extends OpMode {
    DcMotor left;
    DcMotor right;

    public void init() {

    }

    public void loop() {

    }
}
Inside of init(), we want to tell the program that this motor variable corresponds to that motor configured on the robot, and this other motor variable corresponds to that other motor configured on the robot. We do this by setting the variables equal to hardwareMap.dcMotor.get("Name of motor configured on phones");.
@TeleOp
public class MyFirstOpMode extends OpMode {
    DcMotor left;
    DcMotor right;

    public void init() {
        left = hardwareMap.dcMotor.get("left");
        right = hardwareMap.dcMotor.get("right");
    }

    public void loop() {

    }
}
Now we get to the fun stuff. :) Actually moving the robot. Variables with the type DcMotor are objects created from the DcMotor class that have functions that can operate the motors. We will use motorname.setPower() to change the power of the motors. motorname.setPower() takes an input from -1 to 1. -1 is full speed in reverse, 1 is full speed forward, .5 is half speed forward, -.25 is quarter speed backwards, etc. An important thing to know is that motors keep going at the same speed you last told them to go at. So what we can do is inside of loop() set the motor powers over and over at different speeds to control the robot.
@TeleOp
public class MyFirstOpMode extends OpMode {
    DcMotor left;
    DcMotor right;

    public void init() {
        left = hardwareMap.dcMotor.get("left");
        right = hardwareMap.dcMotor.get("right");
    }

    public void loop() {
        right.setPower(1);
        left.setPower(-1);
    }
}
We set the left motor to -1 because it is flipped over when compared to the right motor, so going reverse on the left actually moves the robot forward. If you run this code, your robot should go forward, but we can’t control it. :( For this we need joysticks.
Joysticks
In FTC, you can use two gamepads connected to the Driver Station. Inside of your OpMode, those gamepads are variables named gamepad1 and gamepad2 with the type of the Gamepad class. The Gamepad class has variables on it which correspond to whether a button is pressed and the joysticks. The Gamepad joystick variables are gamepad1.left_stick_x, gamepad1.left_stick_y, gamepad.right_stick_x, and gamepad.right_stick_y. Those variables are also on the second gamepad. They are decimal numbers (doubles) which range from -1 to 1 and correspond to either the x axis or the y axis of the joystick movement.
For a basic tank drive, we will have the y axis on the left and right sticks of gamepad1 directly control the speed of the motors since motor.setPower() takes an input from -1 to 1 and the gamepads output values from -1 to 1.
@TeleOp
public class MyFirstOpMode extends OpMode {
    DcMotor left;
    DcMotor right;

    public void init() {
        left = hardwareMap.dcMotor.get("left");
        right = hardwareMap.dcMotor.get("right");
    }

    public void loop() {
        right.setPower(gamepad1.right_stick_y);
        left.setPower(-gamepad1.left_stick_y);
    }
}
We can apply the negative sign to the value from gamepad1.left_stick_y to reverse its direction and ensure the left motor moves the robot in the same direction as the right motor like mentioned earlier.
That’s it! You should be able to press the green play button in the toolbar and upload code to your Robot Controller and run this code on your tank drive. You will need to configure what motor port corresponds to what name on the phones when you hook up the hardware. You will also need to turn on USB Debugging on the phone and allow the computer to connect to the phone first.
Check out other posts in this series
Join me in learning about how computers work
Just enter your email into the box below. You'll also receive my free 12 page guide, Getting Started with Operating System Development, straight to your inbox just for subscribing.