How To Install Ubuntu in a Virtual Machine on Windows
This tutorial will teach you how to install Ubuntu Linux in a virtual machine on Windows. This is a good way to start setting up a programming development environment because many developer tools and programs are hard to install on Windows or only run on a Linux like Ubuntu. VirtualBox is a program that emulates a computer, so that you can install different operating systems onto the virtual computer. Ubuntu is a Linux distribution that is easy to use and configure which makes it ideal for a beginner to use. When you combine these two technologies together, you get an accessible way to develop programs on Windows without the hassle of downloading and installing Linux on your real non-virtualized computer.
Table of Contents
- Table of Contents
- Downloading VirtualBox
- Installing VirtualBox
- Downloading Ubuntu
- Running Virtualbox
- Installing Ubuntu
- Setting up the virtual machine to handle server capabilities
- Conclusion
Downloading VirtualBox
Go to Downloads - Oracle VM VirtualBox to download the virtualization program.
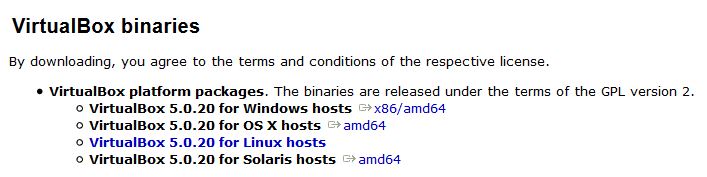
Select the download link for Windows hosts because the computer that is “hosting” the emulation is a Windows machine.
Installing VirtualBox
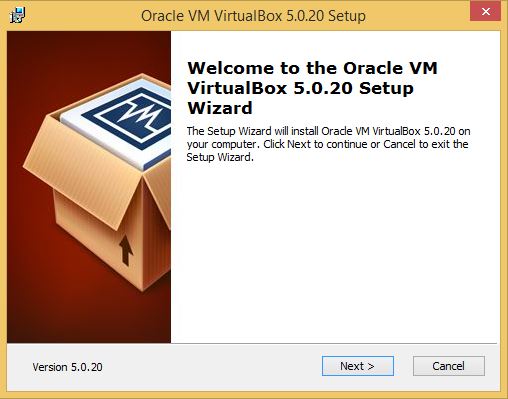
Just click Next and go through the installation with the default options.
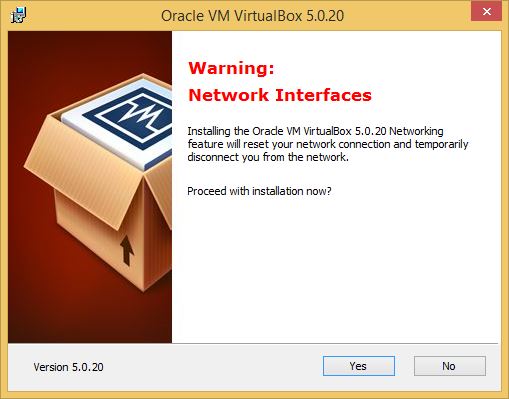
A Warning: Network Interfaces dialogue may appear, but don’t worry – just proceed with the installation. All this means is that VirtualBox is going to install drivers, so that the virtual computer can access the internet by connecting to the your real non-virtualized computer’s internet.
Another dialogue may pop up titled “Windows Security” asking whether or not you would like to install this device software. Proceed with the installation because this is also part of the driver installation process.
Downloading Ubuntu
Go to Download Ubuntu Desktop and click the Download button on the right to download the desktop version of Ubuntu (There are other versions to accommodate use cases like servers and phones).

Unless you would like to donate, you can skip the donation

Running Virtualbox
Open VirtualBox and select the New button.
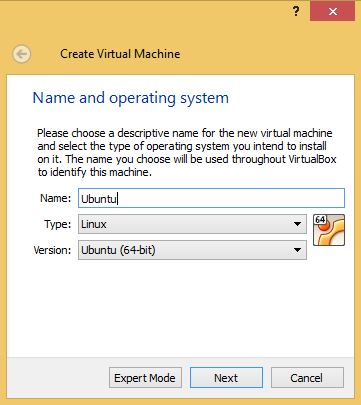
Choose these values and title the virtual machine what you want.
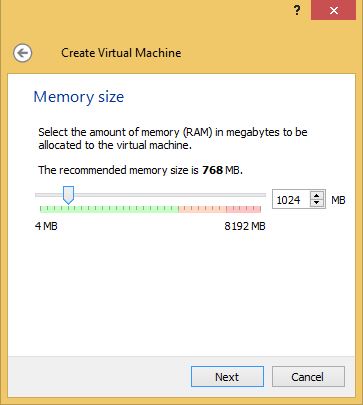
Depending on how much ram your computer has, you want to select as much as possible for the virtual machine, but not more than half the available ram. I have 8GB of ram on my computer, so I don’t have to worry that much about how much ram I select. A user with 2GB of ram might want to select 512MB in order to keep their physical computer running fairly smoothly while operating the virtual machine.
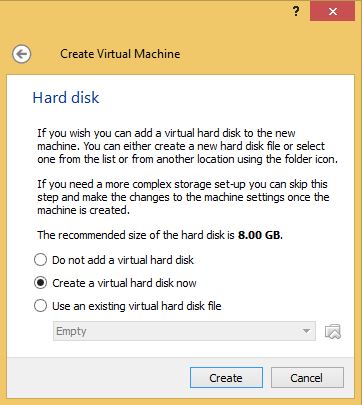
I would keep the default values for this, but maybe increase the hard drive size if possible. VirtualBox creates a virtual hard drive for the virtual machine to keep the files separated from each other. The virtual machine can’t see your personal files with this setup.
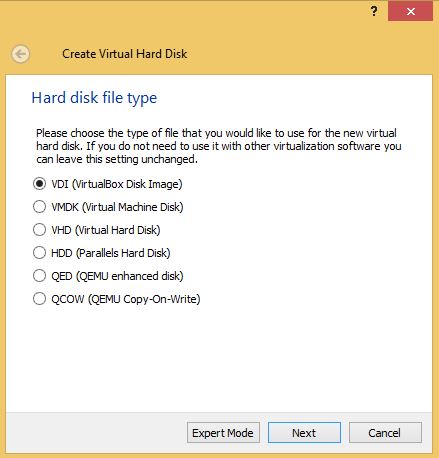
Keep the default option here and click Next – these are just different virtual hard drive formats to choose from.
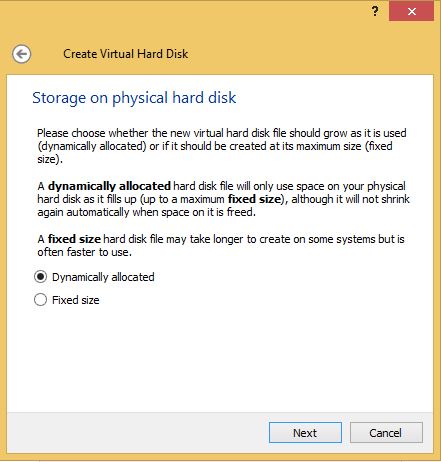
I generally prefer the default option because it allows me to save space on my physical hard drive, but you can choose the other option if you’d like the virtual hard drive to stay a fixed size.
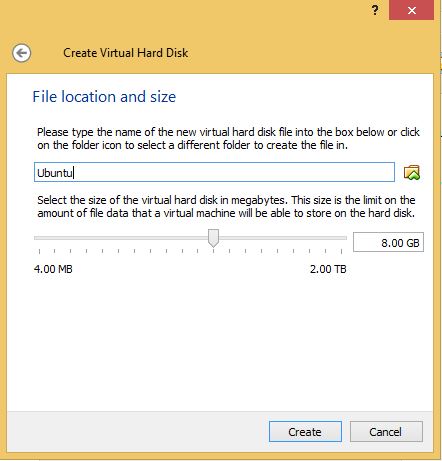
You can change the location and size here if you want, but I like to keep it default.
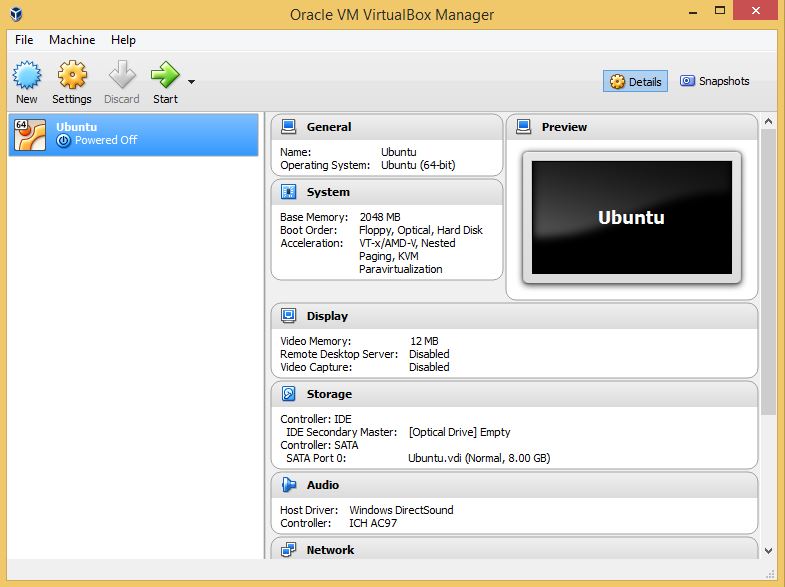
Congratulations! You now have a virtual machine set up for Ubuntu!
Installing Ubuntu
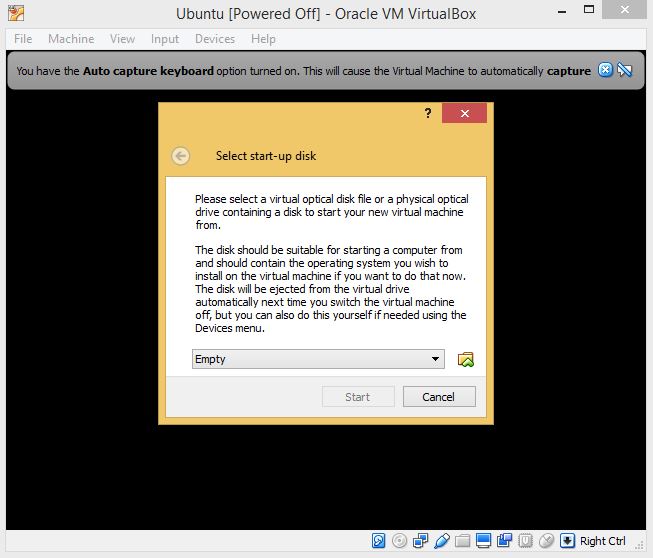
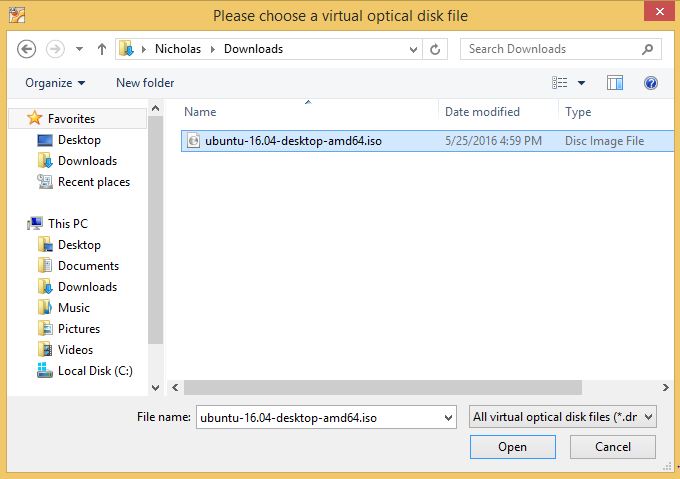
Click Start to power on the machine.
This window should pop up. Click on the folder icon to select the Ubuntu .iso file you downloaded earlier.
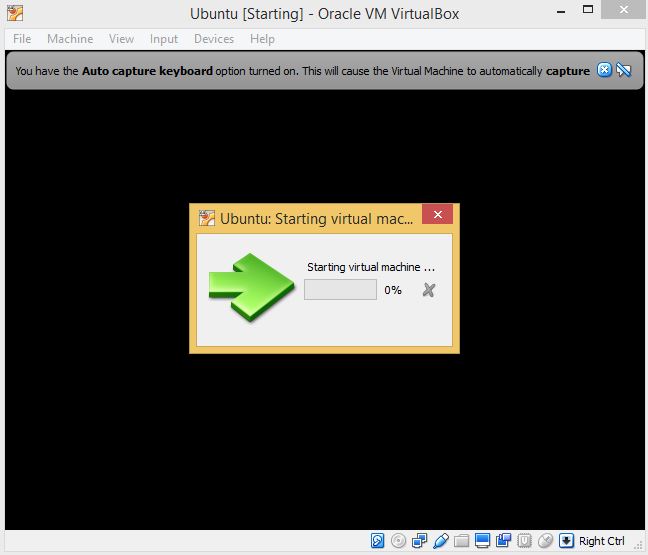
When this screen comes up, it means that the virtual machine is booting successfully.
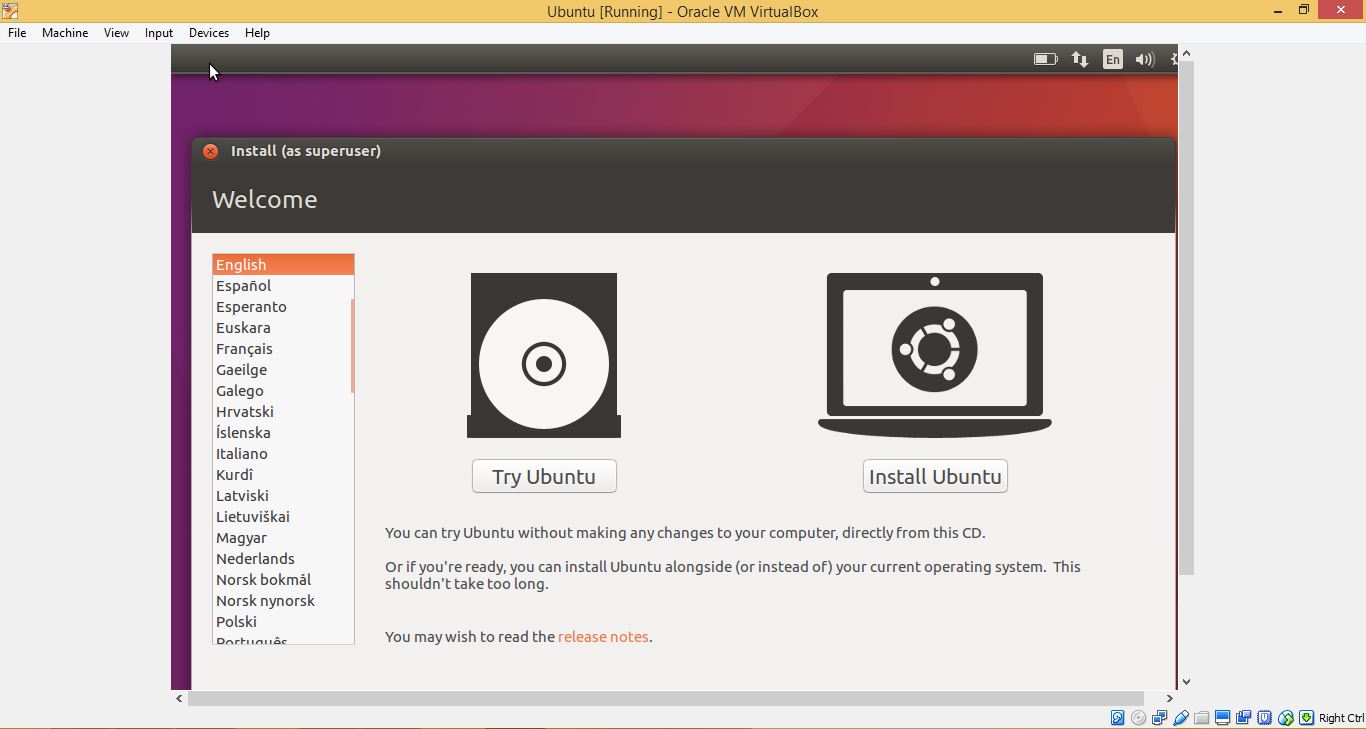
This screen means that Ubuntu has booted up successfully.
If you want to just try Ubuntu, you can choose the try option. However, this guide will go over the installation of Ubuntu, so choose that option if you would like to continue and have Ubuntu persist when you reboot it.
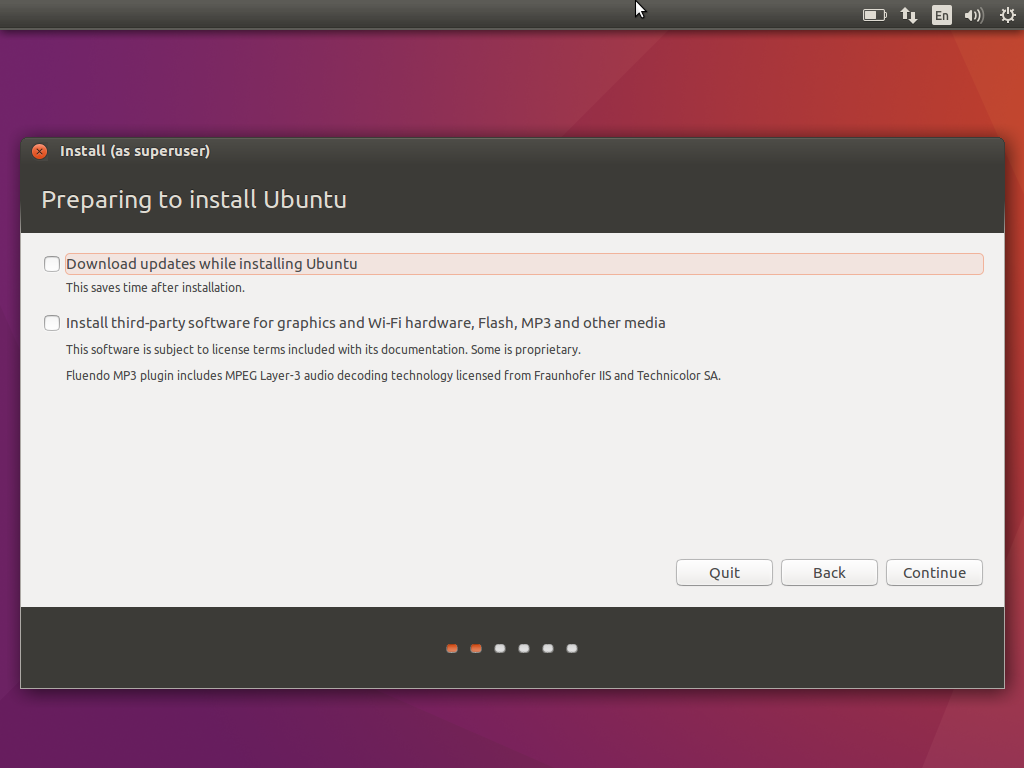
Select these options if you want. Downloading updates now means that it takes longer to install, but you don’t have to update later. Third-party software isn’t necessarily open source (meaning all of the programming code is available for you to view and edit yourself), and can be poorly made. But, it is usually required for many drivers that are essential for using the computer.
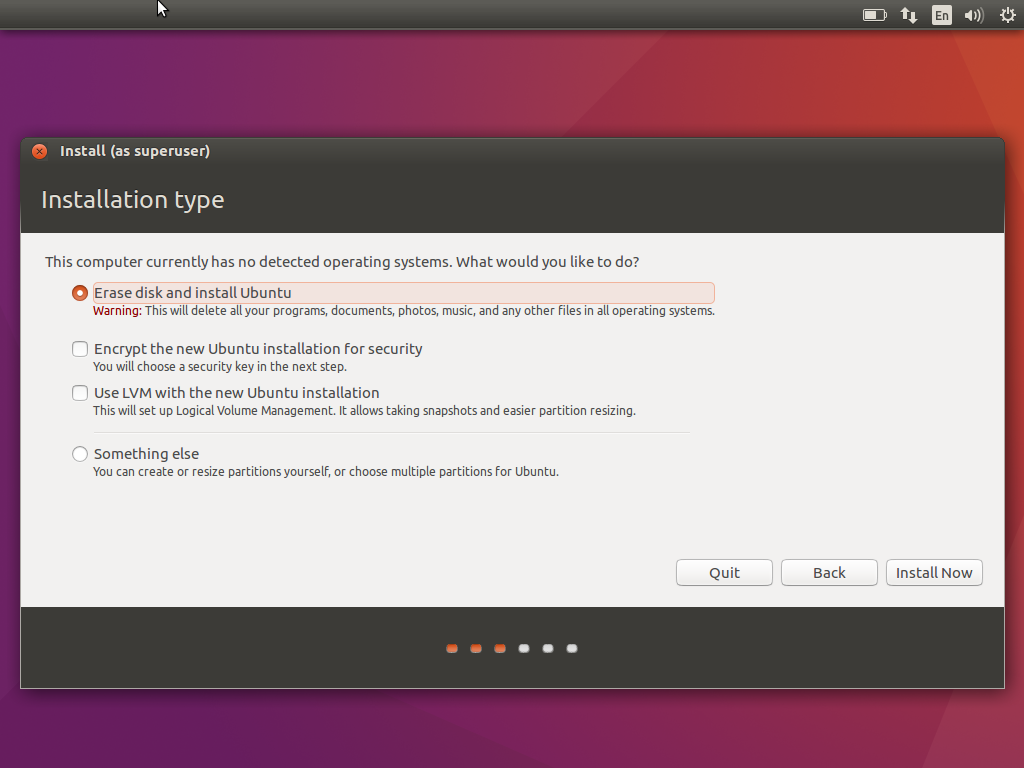
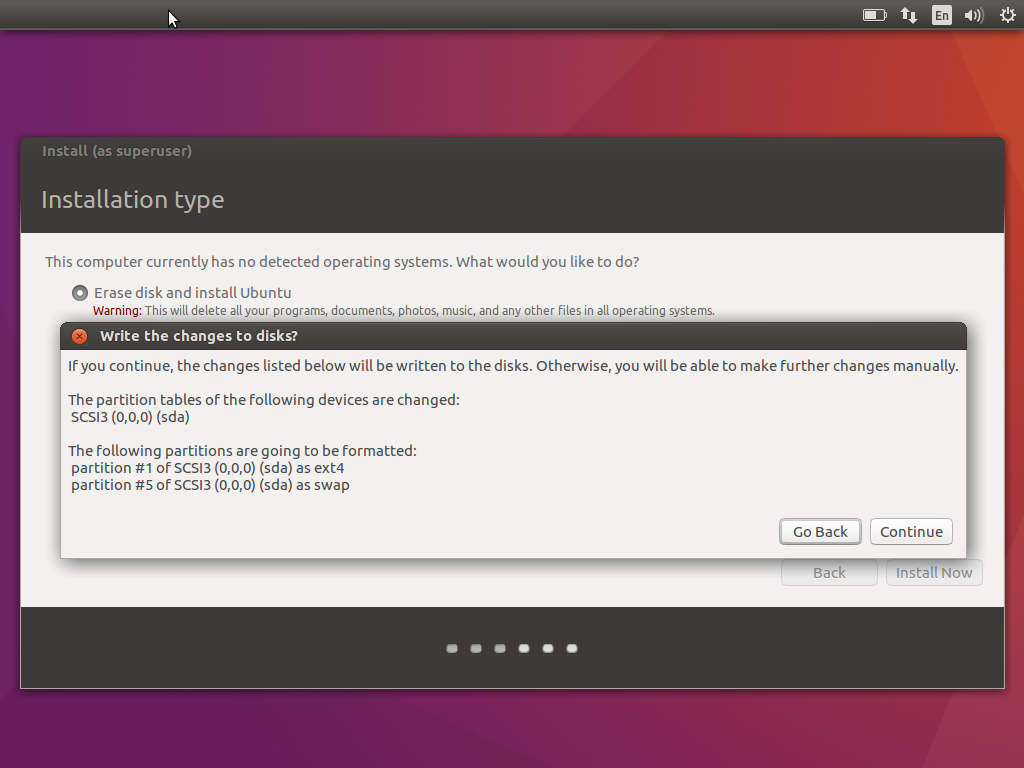
Even though this window says that the first option will erase the whole disk, it means the virtual disk. So, you don’t need to worry about wiping all of your personal files. Select the first option unless you’d like to use another method yourself.
Select Install Now to start the process.
Click Continue.
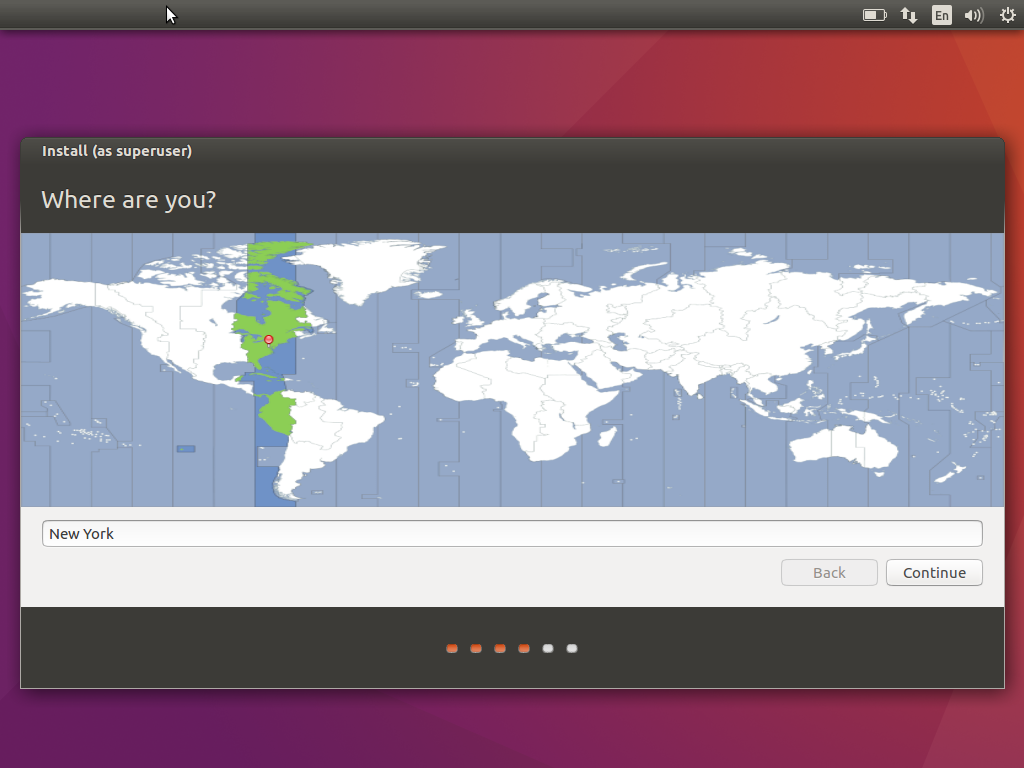
Select your location so that Ubuntu can accurately set the system clock.
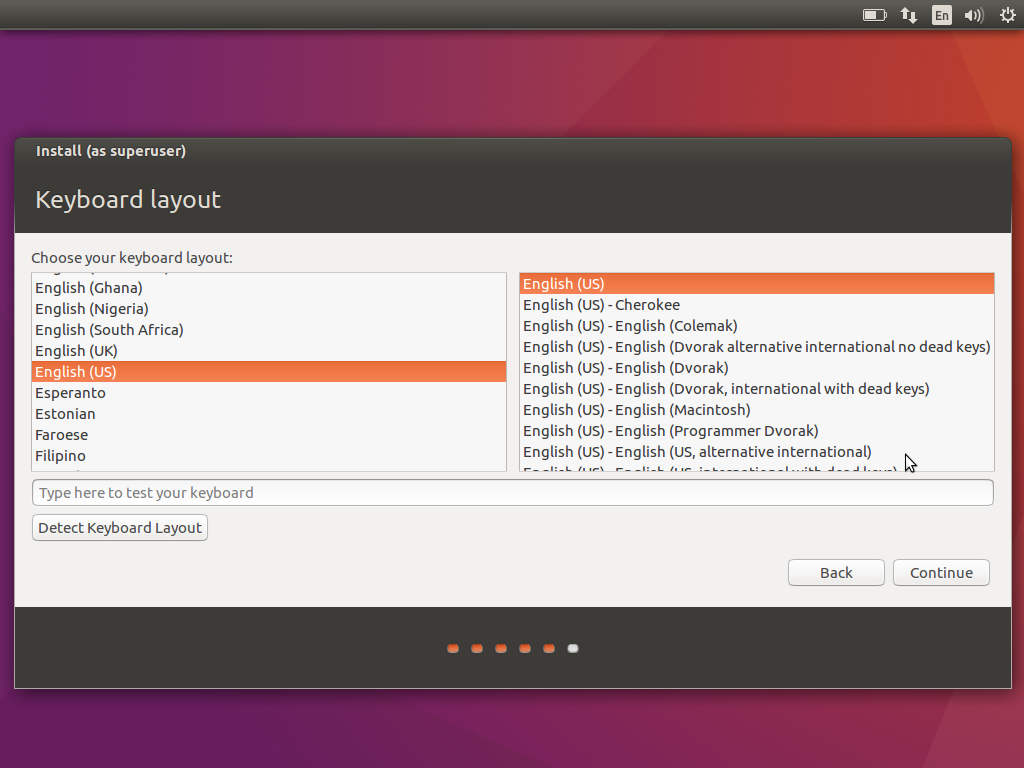
Select your keyboard preference and language.
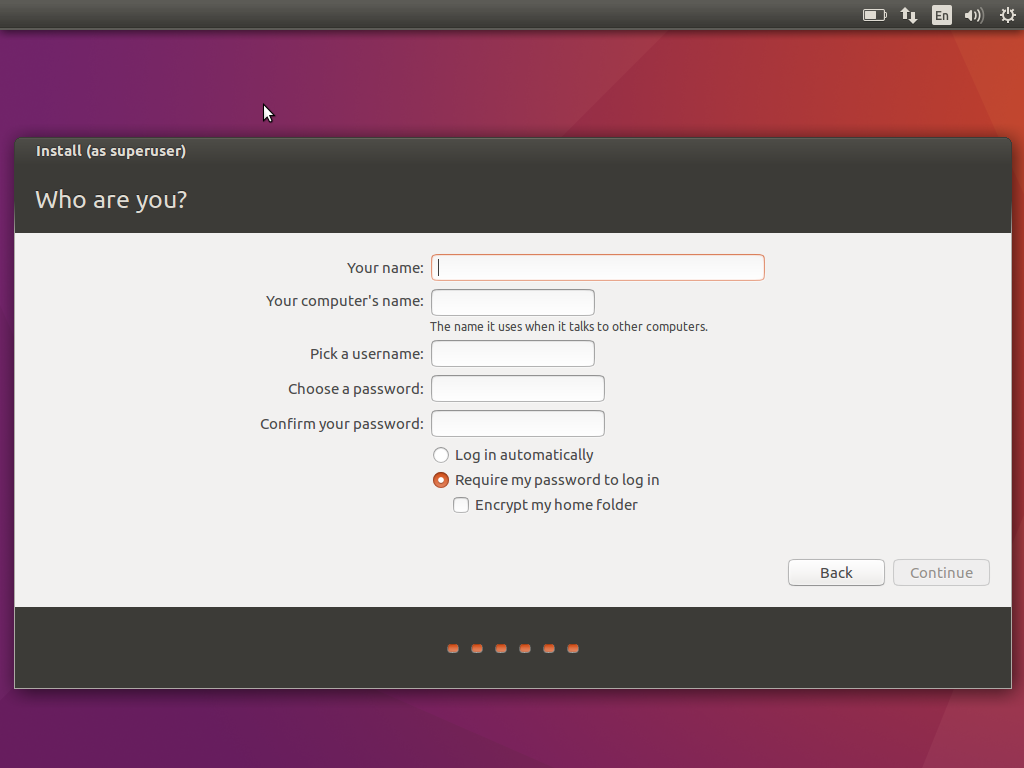
Set your account details to protect your virtual machine and give it a user account. Write this information down because you’ll need it later to log in after it reboots.
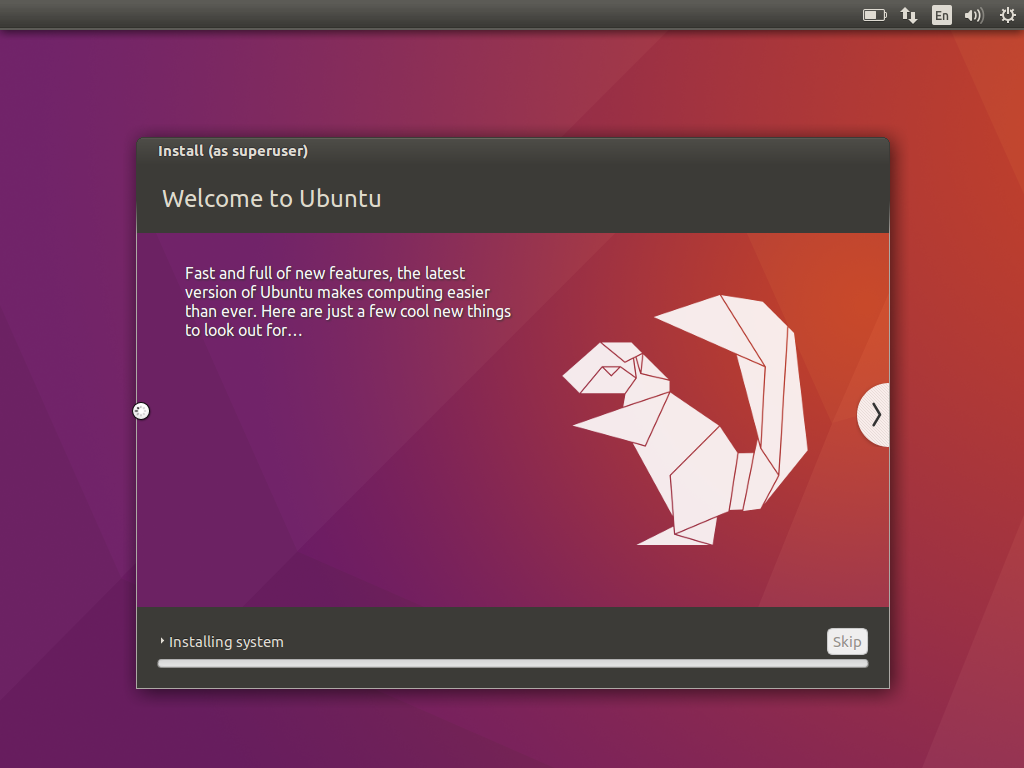
You should see this screen as Ubuntu installs and downloads files to your virtual machine’s hard drive.
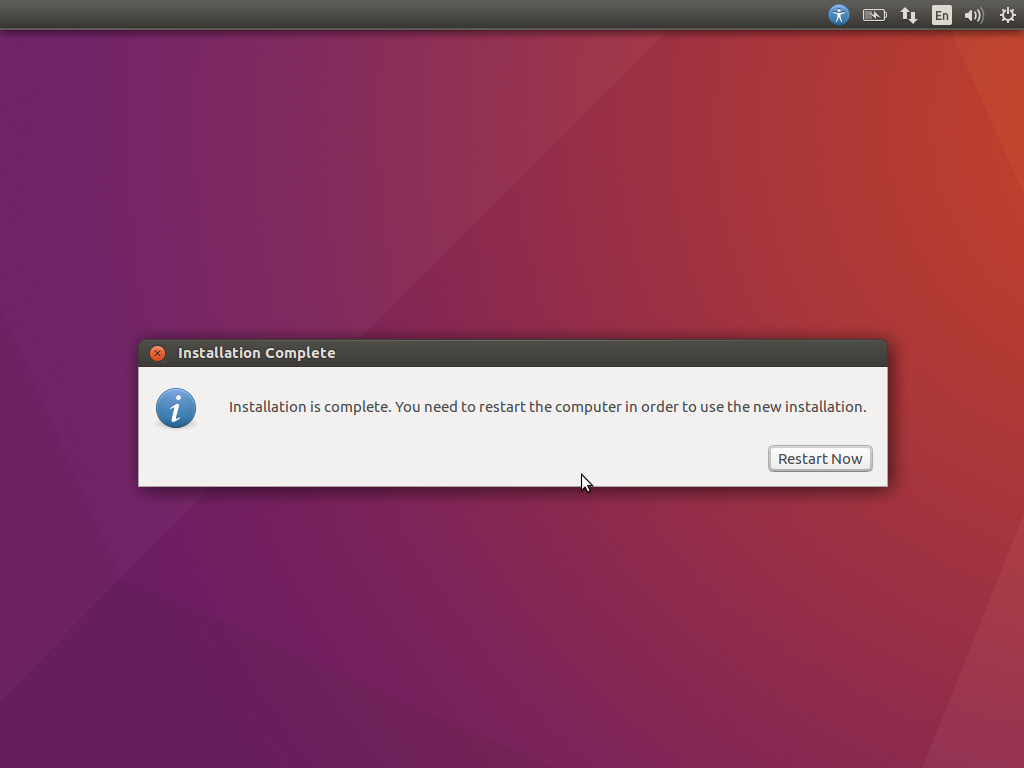
Click Restart to finish installing Ubuntu.
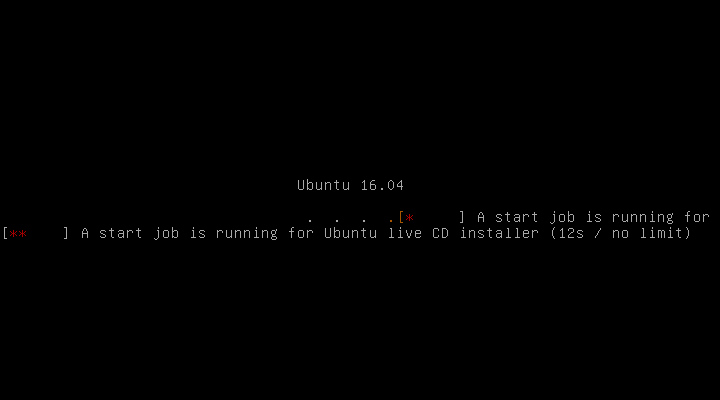
If this image comes up, you’ll have to reset the virtual machine manually.
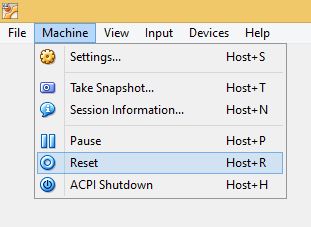
Click Machine, then Reset.
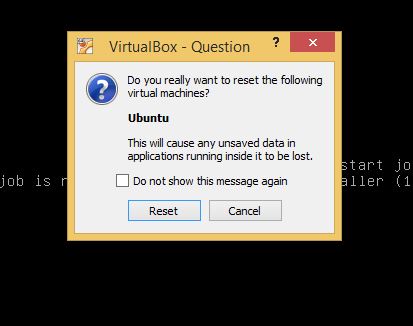
Confirm you want to reset.
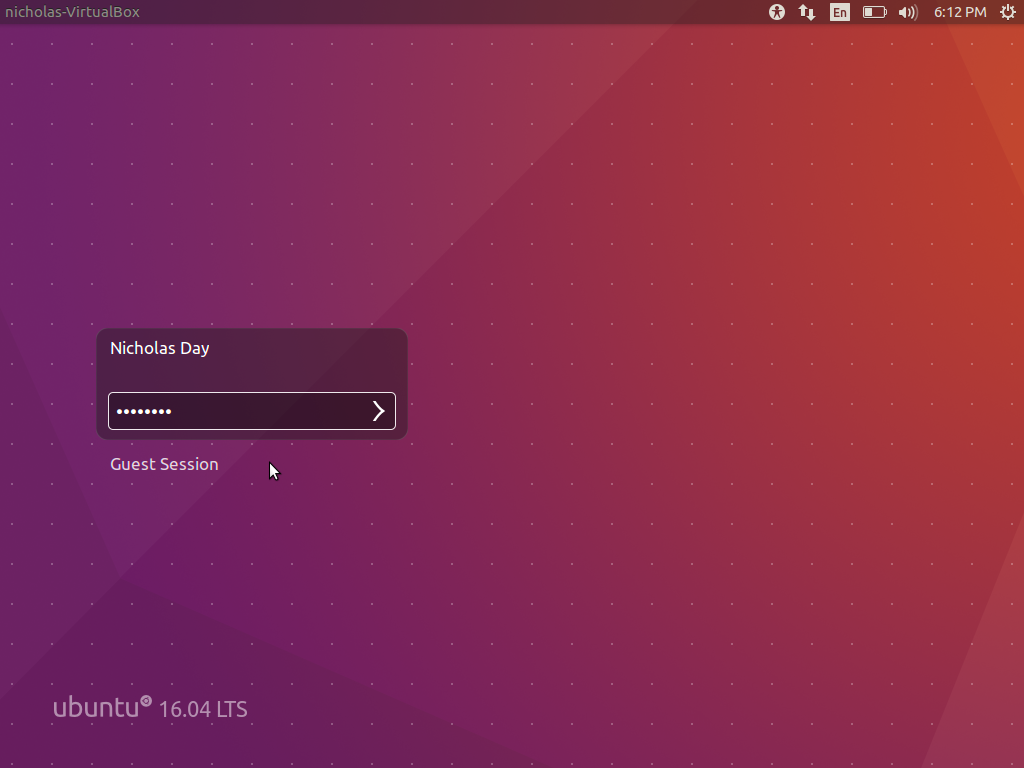
Now your Ubuntu machine should be up and running!
If your screen isn’t scaling right (see the scrollbars at the right and bottom), follow these steps. Otherwise, you’re ready to go!
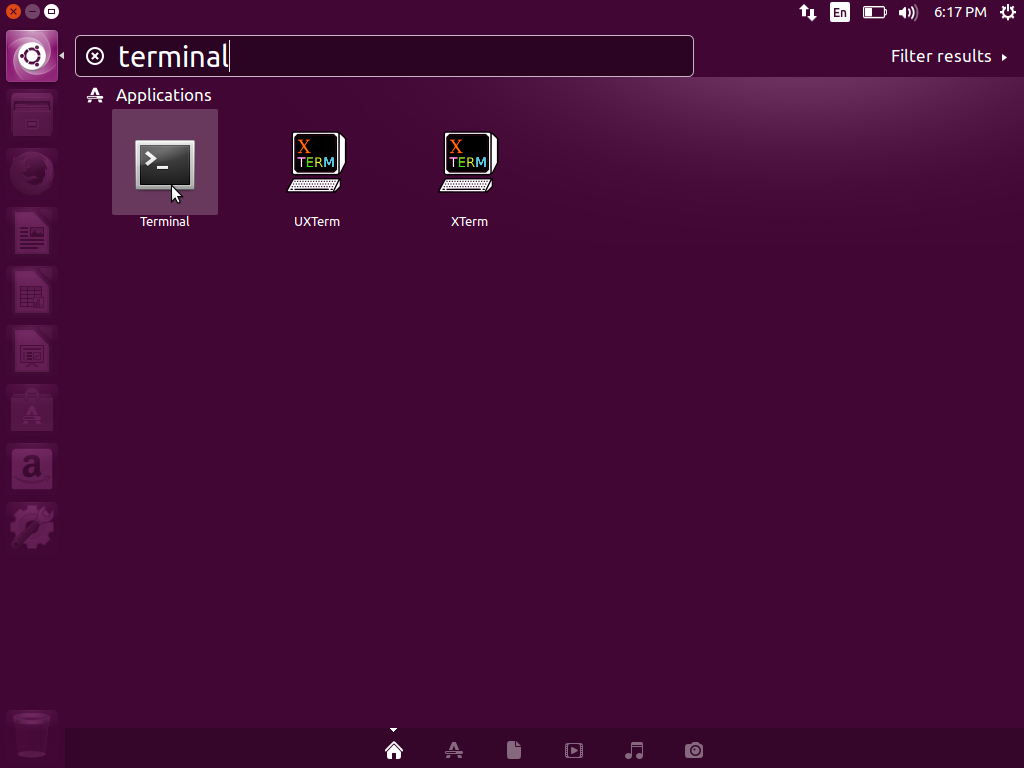
Open up a terminal.
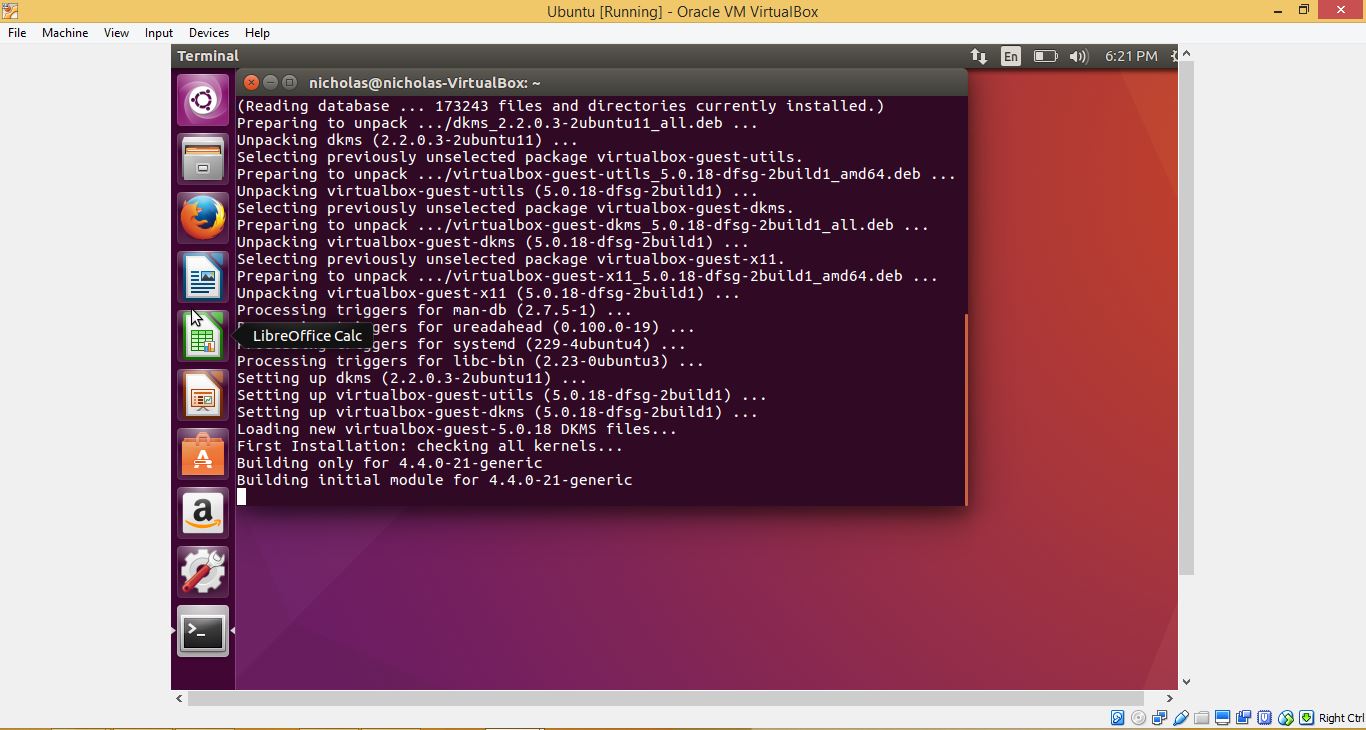
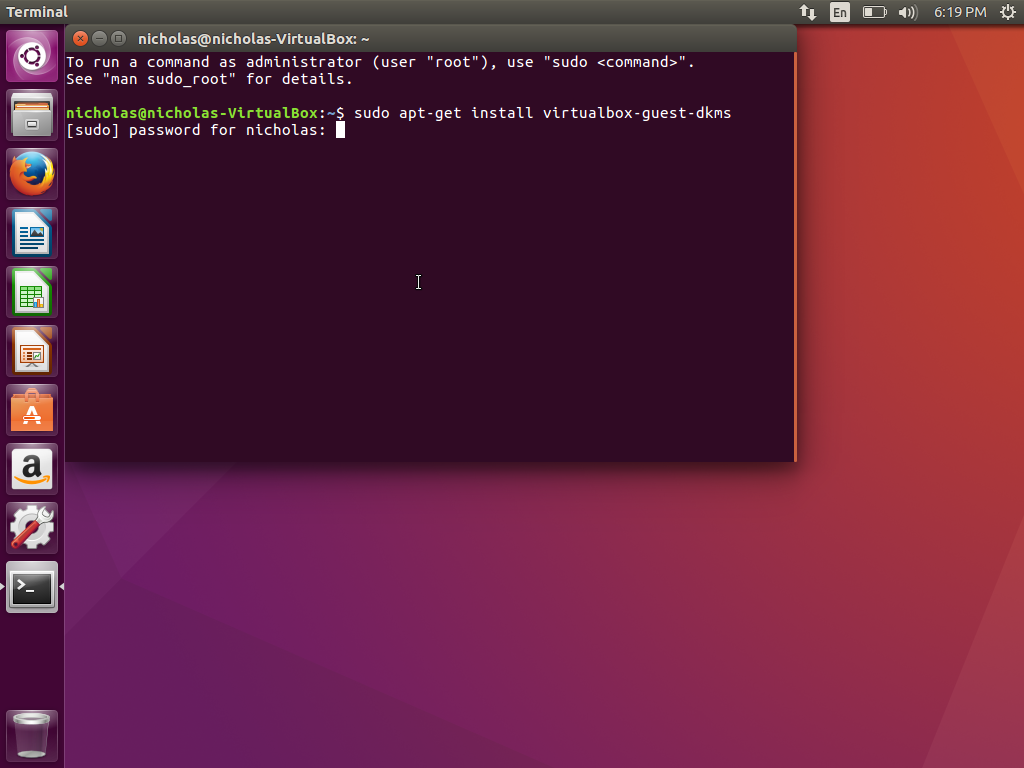
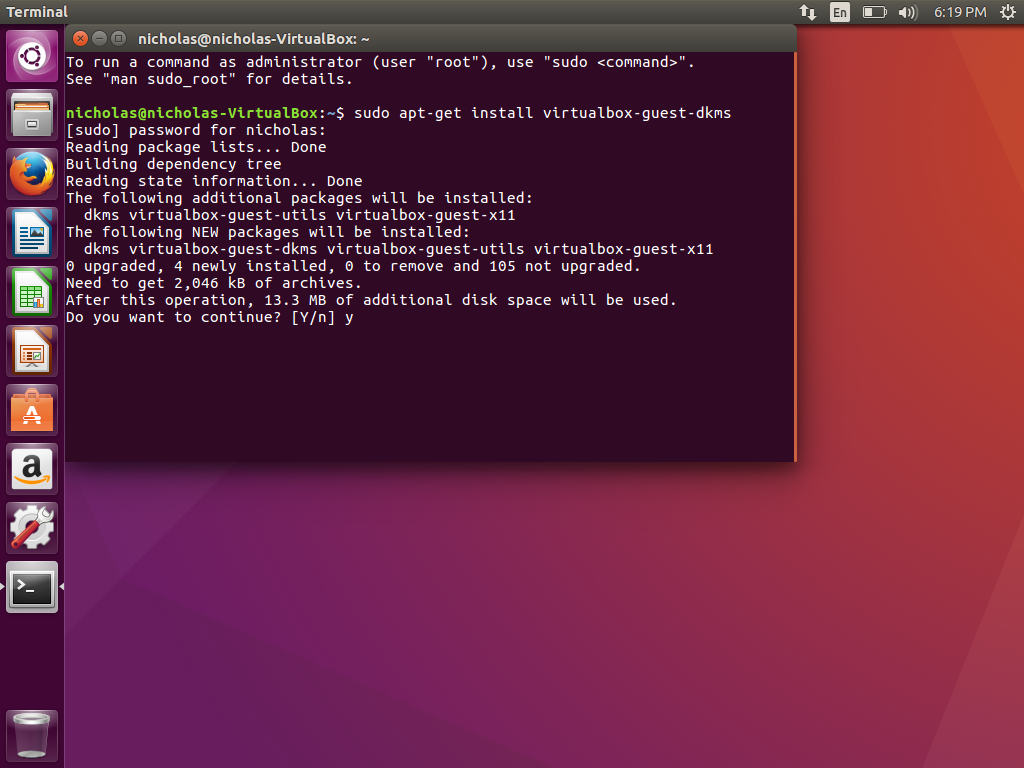
Type in sudo apt-get install virtualbox-guest-dkms and hit Enter. Then type in the password you made for your account earlier and it Enter.
sudogives you root (administrator) privileges to install packages.apt-getinstalls programs from Ubuntu’s repositories.virtualbox-guest-dkmsis the name of the program that gives your Ubuntu virtual machine the right methods to change the display.
Press y and Enter to confirm installation.
After this has finished installing, this will show up with a blinking cursor (with the settings you used for your user account).

Reboot to finish the changes.

Setting up the virtual machine to handle server capabilities
If you want to use your virtual machine as a server or to develop web applications and server programs, you have to switch the virtual machine’s networking to bridged.
First, go to the settings in VirtualBox
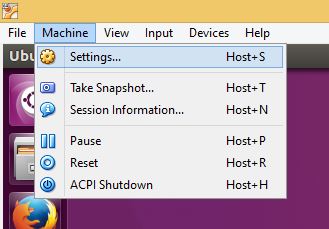
Then, select the Network option on the side and select Bridged Adapter from the Attached to: dropdown in the center.

Conclusion
Now you have a capable Linux virtual machine installed. You could learn how to program on it, run open source software, or learn how to do security testing. Those are just a few options of what you can do in this Ubuntu installation.
Join me in learning about how computers work
Just enter your email into the box below. You'll also receive my free 12 page guide, Getting Started with Operating System Development, straight to your inbox just for subscribing.